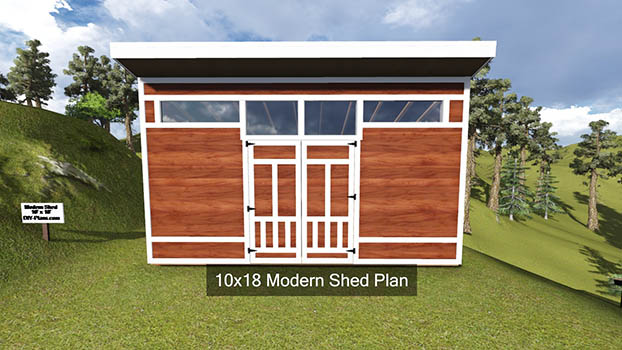
Comprehensive DIY Shed Plans with Detailed Material Breakdown
This document provides comprehensive plans for constructing a robust and aesthetically pleasing 8ft x 6ft garden shed. The design prioritizes simplicity for DIY enthusiasts while maintaining structural integrity. Detailed material lists are included, enabling accurate budgeting and procurement. Remember to always prioritize safety and consult local building regulations before commencing construction.
I. Design Specifications
A. Overall Dimensions
The shed will measure 8 feet (2.44m) in width and 6 feet (1.83m) in depth. The height at the eaves will be 6 feet (1.83m), with a peak height of 7.5 feet (2.29m). This design offers ample storage space while remaining manageable for a DIY project.
B. Foundation
A concrete slab foundation is recommended for optimal stability and longevity. Alternative foundations such as compacted gravel pads may be considered depending on soil conditions and local regulations. The foundation should be slightly larger than the shed's footprint to ensure proper support.
C. Framing
The framing will utilize pressure-treated lumber to resist rot and insect damage. The framing will consist of a robust base frame, wall studs, roof trusses, and rafters. This design prioritizes strength and durability, ensuring the shed can withstand various weather conditions.
D. Roofing
A gable roof design is chosen for its effectiveness in shedding water and snow. The roof will be clad with asphalt shingles, offering an economical and visually appealing solution. Proper ventilation is incorporated to prevent moisture buildup.
E. Cladding
The shed will be clad with horizontal shiplap siding, providing a classic and aesthetically pleasing finish. This material offers excellent weather resistance and ease of installation. Appropriate paint or sealant should be applied for added protection.
F. Door and Window
A single, robust exterior door will be incorporated for easy access. Consideration should be given to security features such as a sturdy lock. A single window will be positioned for natural light and ventilation. This can be a pre-fabricated window unit for ease of installation.
II. Material Breakdown
The following list provides a detailed breakdown of materials required. Quantities may need minor adjustments based on individual needs and cutting losses. Always purchase slightly more than estimated to account for potential errors or damage.
A. Lumber
- Pressure-treated 4x4 posts: 6 (for base frame corners and support)
- Pressure-treated 2x4 lumber: 60 (for wall studs, roof trusses, rafters, and bracing)
- Pressure-treated 2x6 lumber: 10 (for base frame beams and support)
- Shiplap siding: 150 linear feet (adjust based on chosen width and overlap)
B. Roofing Materials
- Asphalt shingles: 3 bundles (adjust based on roof area and shingle coverage)
- Roofing felt: 1 roll
- Roofing nails: 1 box
- Ridge cap shingles: 1 package
C. Concrete Foundation
- Concrete mix: Approximately 1 cubic yard (adjust based on desired thickness and footprint)
- Rebar (optional): For added reinforcement
- Gravel base (optional): For improved drainage
D. Doors and Windows
- Exterior door: 1 (pre-hung door is recommended)
- Window: 1 (pre-fabricated window unit recommended)
E. Fasteners and Hardware
- Exterior-grade screws: Assorted sizes (for attaching siding, framing, and other components)
- Nails: Assorted sizes (for framing and other components)
- Door hinges and handle: 1 set
- Window hardware: 1 set
- Concrete anchors (if applicable): For securing the base frame to the concrete foundation
F. Other Materials
- Paint or sealant: For protecting the wood from the elements
- Caulk: To seal gaps and prevent air leaks
- Level: To ensure the foundation and framing are properly aligned
- Measuring tape: For accurate measurements and cutting
- Saw: For cutting lumber
- Drill: For driving screws and other tasks
- Hammer: For driving nails
- Safety glasses and gloves: For personal protection
III. Construction Process (Summary)
This section provides a brief overview of the construction process. Detailed step-by-step instructions with diagrams are recommended for a complete guide. This is crucial to ensuring a strong and weather-resistant structure.
A. Foundation Preparation
Prepare the ground, excavate, and pour the concrete slab foundation according to local regulations and desired thickness. Allow sufficient curing time before proceeding.
B. Frame Construction
Construct the base frame using pressure-treated 4x4 and 2x6 lumber. Erect the wall frames and ensure plumbness. Assemble and install the roof trusses or rafters.
C. Cladding Installation
Install the shiplap siding, ensuring proper overlap and alignment. Apply caulk to seal any gaps.
D. Roofing Installation
Install roofing felt, followed by asphalt shingles. Ensure proper overlapping and secure attachment.
E. Door and Window Installation
Install the exterior door and window, ensuring proper fit and functionality.
F. Finishing Touches
Apply paint or sealant to protect the wood. Perform any necessary cleaning and finishing touches.
Disclaimer: This plan provides a general guide. Always consult with professionals for specific advice, and always prioritize safety during construction. Modifications to the design may be necessary depending on local building codes and specific site conditions.


/view-of-an-empty-wooden-bench-in-the-sun-near-trees-and-flowers-862172512-5b16e39ca9d4f900389e2ae0.jpg)
